Finding a boom arm that holds your mic steady, stays quiet when you move it, and actually fits your desk can be harder than it should be. Wobbles, sagging, strange clamps, and cable mess are all common. Here are five strong options that stand out from real user feedback:
Top boom arm picks for desk microphone setups
These are pulled from the most trusted and highest rated models. They cover different budgets, desk types, and use cases, so you can match them to your setup instead of guessing.
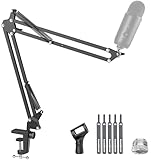
- Free Position Mic Arm: This professional microphone stand is fully adjustable in all parts with 360° base rotation for 135° back and forth extension, 180° arm shaft for up-and-down movement, and 270° metal adapter to freely position microphones. It can be easily folded and pushed away for space-saving storage when it stands idle and pull it back for usage.

- [Sturdy Metal] The all metal microphone arm stand provides stability and sturdy protection for your podcast microphone whether you're gaming, podcasting, recording or streaming. The C-clamp can stay attached to a flat desktop and will not slip, making it less likely to scratch your desktop. Even if you vigorously collide with the arm stand or extend it fully to a certain height, the boom arm won't wobble and still remain stable and sturdy. (The microphone is not included)

- Cable Management Channels: The upgraded mic arms are optimized with built-in channels as cable management for you to put your cables in by simply removing the rubber cable covers, bringing a clean and neat look without getting your setups and cables tangled while recording or live streaming. The thoughtful design frees the whole look of being a mess and provides a shelter for cables.

- 【Boom Arm】 - Suspension boom arm stand fit your Blue Yeti, HyperX QuadCast suitable, you can adjust the mic to the suitable angle or height to show your voice.Before installing your hyperx microphone to the microphone arm, you can loosen the knob and adjust it to the angle you want to tighten after installing your gaming mic.
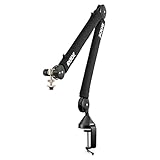
- Broadcast-style Professional Studio Desk Boom Arm with Stard Microphone Threading
What a boom arm actually does for your desk setup
A good boom arm does much more than just hold a microphone above a desk. It shapes how you sound, how you move, and how clean your workspace feels.
With a decent arm, the mic stays in the same spot every time. You pull it in when you speak, push it away when you type, and your audio level stays predictable. That matters for podcasting, streaming, online meetings, and radio listening with commentary or live shows where your own mic matters.
A strong boom arm should feel almost invisible: it holds position, stays quiet, and never distracts you from what you are doing.
On the flip side, a weak arm that drifts, squeaks, or shakes every time you bump the desk will ruin audio. So the goal is not just to buy an arm that looks nice. It is to pick one that suits your mic weight, your desk, and the way you use your station every day.
Key factors to look for in a desk boom arm
Before any brand or fancy marketing, there are a few basic questions worth asking about a boom arm. These decide if it will serve you well or annoy you within a week.
1. Weight capacity and microphone compatibility
Mic weight is the first filter. Every arm has a minimum and maximum supported weight. If your mic is too light, the springs can push it up. If it is too heavy, the arm will sag over time.
Common mic setups:
-
Light mics (150 g to 300 g): small USB mics, simple dynamic mics.
-
Medium mics (300 g to 600 g): many popular podcast and broadcast mics with shock mounts.
-
Heavy mics (600 g to 1.2 kg): broadcast style mics with heavy shock mounts, pop filters, and sometimes inline preamps.
When checking weight ratings, include:
-
Mic body
-
Shock mount
-
Pop filter if it attaches to the mic or arm
-
Any thread adapters
As a rule of thumb, leave at least 20 to 30 percent headroom between your total mic setup weight and the arm rating to avoid long term sagging.
Threading also matters. Most boom arms use 3/8 or 5/8 threads. Many mics and shock mounts ship with an adapter, but not all. If you see mismatched sizes, be ready to add a cheap metal adapter to make them fit correctly.
2. Build quality and materials
Even a basic arm can look fine in photos. The real difference shows up when you move it hundreds of times.
Common materials:
-
Steel: strong, more weight, usually better long term stability.
-
Aluminum: lighter, can feel smoother but sometimes less rigid with heavy mics.
-
Plastic joints or covers: fine in small areas, but full plastic joints wear out faster.
Joints and springs are the weak points. Good arms use strong hinges with metal internals and springs that are either external (visible) or internal (hidden in the arms). External springs are easier to inspect, but some people prefer the cleaner look of hidden springs.
If a boom arm creaks, flexes, or shifts position when you tap the desk, the structure or joints are not doing their job.
Powder coating or durable paint also plays a role. Cheaper finishes chip easily, and that is often a sign of weaker overall build standards too.
3. Range of motion and adjustability
A boom arm can look great yet still not reach where you actually sit. Think about how you sit at your desk before picking arm length and rotation style.
Questions to ask yourself:
-
Do you sit centered to the monitor or off to one side?
-
Do you want the arm coming from the left, right, or behind the monitor?
-
Do you stand sometimes and sit other times?
-
Do you move the mic away many times a day, or leave it in one place?
Look at these movement specs in particular:
-
Horizontal reach: how far the arm can extend from the clamp base.
-
Vertical reach: how high and low it can go relative to desk surface.
-
Rotation at base: 180 or 360 degree rotation at the clamp.
-
Joint angles: if joints can fold back on themselves or have limited range.
For streamers and podcasters who reposition a lot, smooth movement with light touch is helpful. For a fixed radio listening setup where the mic rarely moves, a stiffer arm can actually feel more solid.
4. Mounting system: clamp vs desk grommet
How the arm attaches to your desk is often ignored, but it can decide if the arm fits your furniture at all.
Main mount types:
-
Desk clamp: clamps onto the edge of the desk with a screw. Fast to set up. Needs solid edge and enough overhang.
-
Grommet mount: passes through a hole in the desk (or an existing cable grommet) and tightens from below. Cleaner, but needs drilling or a preexisting hole.
Consider:
-
Desk thickness: most clamps support a certain range of thickness. Very thick or thin desks can be a problem.
-
Edge shape: curved or beveled edges reduce grip area.
-
Material: soft wood or thin laminated boards can dent under heavy clamps.
If your desk is a glass panel, tread carefully. Some arms offer rubber pads and wide clamps to spread pressure, but glass always carries more risk, so a grommet or wall mount might be safer.
5. Noise handling and vibration isolation
Good sound is not just about the mic capsule. It is about what vibrations reach the mic through the arm and desk.
Common noise sources:
-
Typing and mouse clicks traveling up the desk into the arm.
-
Low frequency hum from PC fans or equipment racks.
-
Foot taps or chair movement shaking the floor and desk.
-
Arm spring noise when moved quickly.
Better arms reduce this in a few ways:
-
Tight, smooth joints that do not rattle.
-
Springs that do not ring or scrape when moving.
-
Stable bases that do not flex under normal use.
Pairing the boom arm with a decent shock mount and a mic that has low handling noise will make a clear difference in the final sound, especially at higher gain.
6. Cable management details
Cables are boring, but in a visible desk setup they matter more than most expect. A hanging mic cable can drag the arm or add noise when it tugs on the mic.
Typical cable management designs:
-
Built in channels: cables run inside the arm or behind removable covers.
-
External clips: plastic clips that snap onto the arm.
-
Velcro or ties: simple but less tidy.
Arms with full internal routing look cleaner and avoid snagging when the arm rotates. They also keep cables in a more controlled position for longer runs back to an audio interface or mixer.
7. Aesthetics and desk integration
For many people, the mic is visible on camera or sits in their main work area for long stretches. So the arm should fit the look of the space.
What to think about visually:
-
Color: usually black, white, or occasionally silver.
-
Shape: thin, low profile arms vs bulky, industrial styles.
-
Visible springs or hidden springs.
-
Logo placement and size.
If you care about a clean radio style station or a streaming scene where the arm appears in the frame, choosing one that matches your monitor stand, speakers, or rack gear can actually make the whole space feel more planned and less random.
Different types of boom arms you will run into
Not all boom arms are aimed at the same kind of user. Understanding the rough categories helps narrow down what fits your case.
Entry level budget arms
These are usually spring loaded, metal tube arms with visible external springs. They cost less and often come bundled with beginner mics.
Typical traits:
-
Lower weight capacity.
-
More flex in the arms under load.
-
Basic external cable clips or none at all.
-
Smaller clamps meant for thinner desks.
They are fine for light USB mics or a basic dynamic mic if you are starting out. For regular streaming or voice work, though, many users upgrade once they start noticing sagging or noise.
Mid range arms for serious home setups
This is where many people end up happy. Stronger metal, better joints, smoother motion, and improved clamps make a real difference for daily use.
In this tier you will find:
-
Higher weight support that covers most podcast mics with shock mounts.
-
Internal or better external springs for smoother motion.
-
Cable channels or built in clips that look cleaner.
-
More precise tension adjustments.
For a home radio booth, serious hobby podcast, or streaming channel, this range usually gives the best balance of cost and performance.
Broadcast and studio grade arms
These arms are designed for studios where the mic may move constantly for years. The price is higher, but so is durability and quiet operation.
Common features here:
-
Very smooth joints with minimal play.
-
Excellent noise handling and minimal mechanical sound.
-
Higher capacity for heavy broadcast mics.
-
Multiple mounting options like clamps, grommets, and permanent stands.
These can make sense for serious creators, shared studios, or anyone who treats their audio setup more like a long term workstation than a short project.
Compact or low profile arms
Some arms are shorter or designed to sit lower and closer to the desk surface. They stay out of the camera frame and do not block the monitor.
They work well if:
-
The desk is shallow.
-
The monitor is low and close.
-
The user wants a very clean visual line.
They sometimes trade off vertical reach, so taller users or those who switch between sitting and standing should check height specs more carefully.
Comparison table: what matters at a glance
This table shows the main criteria that separate weak boom arms from strong ones when building a desk microphone setup.
| Factor | Why it matters | What to look for |
|---|---|---|
| Weight capacity | Stops sagging and drifting with your mic | Support comfortably above total mic + mount + filter weight |
| Build quality | Controls noise, flex, and long term wear | Metal joints, sturdy arms, reliable springs |
| Range of motion | Lets you place the mic exactly where you need it | Good horizontal reach, height range, and rotation |
| Mount type | Decides if it fits your desk safely | Clamp and/or grommet with support for your desk thickness |
| Noise control | Reduces rumble, creaks, and handling noise | Tight joints, quiet springs, compatible with shock mounts |
| Cable management | Keeps the setup tidy and prevents cable drag | Internal routing or solid external clips |
| Looks and size | Impacts how your station feels and appears on camera | Color, shape, and length that suit your space |
Detailed buyer guide for boom arms
Once you know the general factors, it helps to walk step by step through the buying process. That way you avoid ending up with something that works on paper but not on your specific desk.
Step 1: Map your current and future microphone setup
Start with what you have now, but keep an eye on what you want later. Many people upgrade mics after getting into recording or streaming, and that affects arm choice.
Questions to ask:
-
What mic do you use now and what is its weight?
-
Do you plan to add a shock mount soon?
-
Will you use a heavy metal pop filter, or a light fabric one on a gooseneck?
-
Are you eyeing a heavier broadcast mic in the future?
If there is a chance of a heavier mic later, pick an arm with a higher weight ceiling now. That way you do not end up buying twice.
Step 2: Measure your desk and layout
It sounds basic, but measuring saves a lot of frustration. You want to know:
-
Desk depth: from front edge to wall or back edge.
-
Desk thickness: where the clamp will attach.
-
Space behind the monitor: room for the arm base and movement.
-
Preferred side: left, right, or center behind the monitor.
Once you know these, you can compare them to the arm reach values in the product specs. If not listed clearly, assume that shorter arms will struggle to reach across deep desks from behind the monitor.
Step 3: Decide how far you want the mic from your face
Mic distance affects both sound and ergonomics. Many people prefer the mic slightly below mouth level, off to one side, and roughly a fist to a hand span away.
Think about:
-
Camera framing: do you want the mic visible, partially visible, or mostly out of frame?
-
Reading or screen use: will the mic block text or controls?
-
Breathing and plosives: very close mics need better technique and pop control.
Once you picture the location, check if the arm can reach that spot without being fully stretched out or forced into strange angles. An arm that works near the middle of its range is usually more stable than one maxed out at every joint.
Step 4: Pick your mount style and placement
This is where you match what you know about your desk with the clamp or grommet system.
Clamp mount is fine if:
-
Your desk edge is strong and flat.
-
The surface does not chip easily.
-
You are fine with a visible clamp at the edge.
Grommet mount is better if:
-
You want a cleaner look with less visible hardware.
-
You do not mind drilling a hole or already have a cable hole.
-
You want more solid, centered pressure through the desktop.
Whatever you choose, leave space around the mount for arm rotation. Some arms rotate fully at the base, so they need a small clearance circle around the clamp where they will not bump into shelves or walls.
Step 5: Look at real user experiences
Technical specs are helpful, but they rarely reflect how an arm behaves after months of daily use.
When checking user reviews, focus on:
-
Comments about sagging over time, not just on day one.
-
Reports of squeaks, clicks, or spring noise when moving the arm.
-
How people with similar microphones describe balance and stability.
-
Any mention of the clamp bending or damaging desks.
Many reviewers also share desk thickness and mic models, which can help you match their experience to your situation.
Pros and cons of using a boom arm for your microphone
Adding a boom arm changes how you work and how your desk looks. For most users, the gains are worth it, but there are trade offs worth considering.
Why a boom arm can be a strong upgrade
-
Keeps the mic at consistent distance and angle, which improves voice tone and level.
-
Frees space on the desk by removing bulky mic stands.
-
Makes it easy to move the mic in and out of position with one hand.
-
Helps reduce vibration from typing and desk bumps when paired with a shock mount.
-
Allows better camera framing, avoiding a stand in front of your face.
-
Provides more flexibility to fine tune mic placement for different seating positions.
-
Can tidy up cables and reduce clutter when cable routing is built into the arm.
-
Gives a more professional look, which can help guests or clients take your setup more seriously.
Downsides and things that can go wrong
-
Cheap arms may sag, squeak, or drift, which quickly leads to frustration.
-
Clamps can damage soft or thin desks if tightened too hard.
-
Very heavy mics sometimes need more expensive arms to avoid problems.
-
A long arm placed badly can block screens, speakers, or lighting.
-
Springs and joints wear out with time, especially under high load.
-
Setup and fine tuning takes effort compared to a simple desktop stand.
-
In small spaces, careless movement can knock the mic into monitors or faces.
-
Some arms transmit more vibration from the desk than a well isolated floor stand.
Common mistakes when choosing a boom arm
There are patterns that keep showing up in frustrated reviews. Avoiding these saves time and money.
Ignoring mic weight and balance
Many buyers only look at the maximum weight rating. That number alone can be misleading. Some arms technically hold the weight but sit right at their limit, which makes movement jerky and height adjustments tricky.
Balanced setups feel light and smooth to move. Unbalanced ones snap up or fall down. When in doubt, choose the arm rated slightly above your needs rather than right on the edge.
Not checking desk compatibility
This is a big one. An arm that reviewers love may clamp badly to your glass corner desk or ultra thick wooden slab. Then all the other positives do not matter.
Problems often show up as:
-
Clamp does not open wide enough.
-
Clamp bottom plate is too small and digs into the surface.
-
Beveled or curved edges leave gaps so the clamp slips.
If a desk is unusual, focus on arms with wider clamps and thick padding. Or plan for a grommet mount instead.
Overlooking noise from the arm itself
Some arms look fine but creak every time they move. For a casual chat, that might be acceptable. For recording or streaming, those noises become very obvious and annoying.
It is wise to move the arm while listening through headphones during initial setup. That helps spot rattles or scraping springs early. Sometimes a small tension tweak or adding a bit of padding at cable contact points can fix minor noises.
Choosing an arm that is too large for the space
Bigger is not always better. A long, tall arm on a shallow desk can feel overkill and end up hovering awkwardly far away just to avoid blocking the monitor.
If you sit very close to the screen and want the mic to the side, a low profile or shorter arm can feel more natural, even if it seems less impressive on paper.
Setting up a boom arm for best results
Once you pick an arm, a little care during setup goes a long way. A rush job often leads to rattling, sagging, or simply strange positioning that never feels right.
Mount placement and first fit
Start by placing the clamp or grommet mount where you think it should go. Then, without fully tightening, test how the arm reaches your mouth from that point.
Some practical tips:
-
Give enough clearance so the arm does not hit the back of the monitor when folded.
-
Keep it slightly off center if directly behind the monitor to avoid view obstruction.
-
Make sure there is space for your hands and keyboard when the arm is parked away.
Adjust the mount position a few times before final tightening. It is easier to experiment at this stage than to live with a bad choice later.
Balancing the arm with your mic
Attach the mic, shock mount, and any filters you plan to use. Then set the arm to a natural position where you would talk. From there, adjust the spring tension and joint friction so the mic stays in place without effort.
The goal is:
-
No upward or downward drift when you let go.
-
Light pressure needed to move the mic around.
-
No sudden snapping when the arm crosses a certain angle.
If the arm has tension screws, move in small steps and test between each adjustment. A tiny change can have a strong effect on balance.
Cable routing and strain relief
Run the mic cable along the arm using internal channels or clips. Leave a small service loop near the mic so it can move freely without pulling on the connector.
Then check:
-
That the cable does not get pinched in any joint when moving the arm fully.
-
That the cable does not tug enough to move the mic when you shift positions.
-
That the cable stays away from sharp bends that could cause long term damage.
If you use other accessories like camera arms or light arms nearby, keep their cables separated from the mic cable as much as possible to reduce any interference or tangling.
FAQ about boom arms for desk microphone setups
Do I really need a boom arm for my desk microphone setup?
A boom arm is not strictly required, but it solves several common problems at once. It stabilizes mic distance, reduces desk clutter, and improves comfort during long sessions. For simple, occasional calls, a desktop stand can be enough. For frequent recording, streaming, or radio style commentary, a boom arm usually feels like a clear upgrade.
What weight capacity should I look for in a boom arm for a podcast microphone?
For a typical podcast microphone with a shock mount and pop filter, aim for an arm rated for at least 1 kilogram, even if your current setup weighs less. That leaves margin for accessories and future mic upgrades, and helps prevent sagging and tension problems.
Is a cheap boom arm good enough for a USB microphone?
For a light USB microphone, a cheaper arm can work if you accept some trade offs. Movement may be less smooth, noise isolation weaker, and long term durability lower. If you plan to record often or upgrade your mic later, stepping up to a mid range arm usually makes more sense.
How does a boom arm improve audio quality in a desk microphone setup?
A boom arm improves audio in a few indirect ways. It keeps the mic at a stable distance, so your volume does not change as much when you move. It can also reduce desk vibrations when paired with a shock mount. Finally, because the mic is easier to position correctly, you can find a spot that captures your voice clearly while avoiding keyboard noise as much as possible.
Can a boom arm damage my desk?
A clamp mount can damage a desk if the pad is thin, the material is soft, or the clamp is over tightened. To reduce risk, use arms with wide, padded clamps, and tighten just enough to keep the mount secure. For very soft wood, thin panels, or glass, a grommet mount or a separate mounting plate under the desk can spread the load better.
What is the best place to mount a boom arm on a small desk?
On a small desk, placing the boom arm at the back corner usually works best. It keeps the center space clear for the keyboard and mouse, and still lets the mic swing in front of your mouth. If the desk is shallow, a low profile arm that comes from the side rather than high above the monitor can feel more natural.
Do I need a shock mount if I already have a solid boom arm?
A boom arm reduces some types of noise, but it does not fully isolate the mic from vibrations. A shock mount helps filter out low frequency rumbles from typing, desk bumps, or slight arm movements. For spoken voice, using both an arm and a shock mount is still considered a strong combination.
What kind of boom arm is best for a heavy broadcast microphone?
Heavy broadcast microphones need arms with higher weight ratings and stronger springs. Look for models built for studio or broadcast use that list support for heavier mics. Arms aimed at light USB mics tend to struggle with heavier loads and may sag or wear out quickly.
How high should a boom arm place the microphone for voice recording?
Many people aim to position the microphone slightly below mouth level, angled up toward the face. That reduces plosive blasts on the capsule and keeps the view of the screen open. The optimal height depends on your posture and mic pattern, but as a starting point, set the mic at roughly chin level, then adjust by small amounts until your voice sounds natural and clear.
Are internal spring boom arms better than external spring ones?
Internal spring arms look cleaner and often protect the springs from dust and accidental hits. External spring arms can be easier to inspect and service. The real quality difference comes from the design and materials, not just where the springs sit. A well built external spring arm can outperform a poorly built internal spring design.
Can a boom arm be used for more than one microphone?
Yes, as long as the different microphones fall within the boom arm weight range and share compatible thread sizes or adapters. Many users swap mics on the same arm by unscrewing the shock mount or clip and attaching another one. Just remember to rebalance the arm if the new mic weight is different.
What should be checked first if a boom arm starts to sag?
If a boom arm starts sagging, first check the tension adjustment and confirm it is set correctly for your mic weight. Next, inspect the joints for loosened screws and tighten them slightly. If sagging continues even with correct tension, the springs may be at their limit or worn, and the arm might not be suited for that mic weight long term.
So which type of boom arm makes the most sense for your desk?
The honest answer is that it depends on your mic weight, desk style, and how often you move the mic. Light users with small desks and light mics often do fine with a compact entry or mid range arm. Heavier mics, long sessions, and more demanding recording push the choice toward stronger, quieter models.
If you picture how you sit, how you speak, and how your room looks on camera, the right type usually becomes clear. From there, checking weight ratings, mount options, and real user reviews will guide you the rest of the way.